
Stained Glass Angel Christmas Card with So Very Merry Stamp Set

Have you ever tried the Stained Glass Technique when making a greeting card? I made this card and posted a video on how to do it on my Facebook page last week.
You can see that video here:

I knew I wanted to do the Stained Glass Technique when I saw the So Very Merry Stamp Set. The stamp set has a stained glass look to each image. It makes the images fun to colour as you will want to use slightly different colours for each part of the images, just like a real stained glass window.
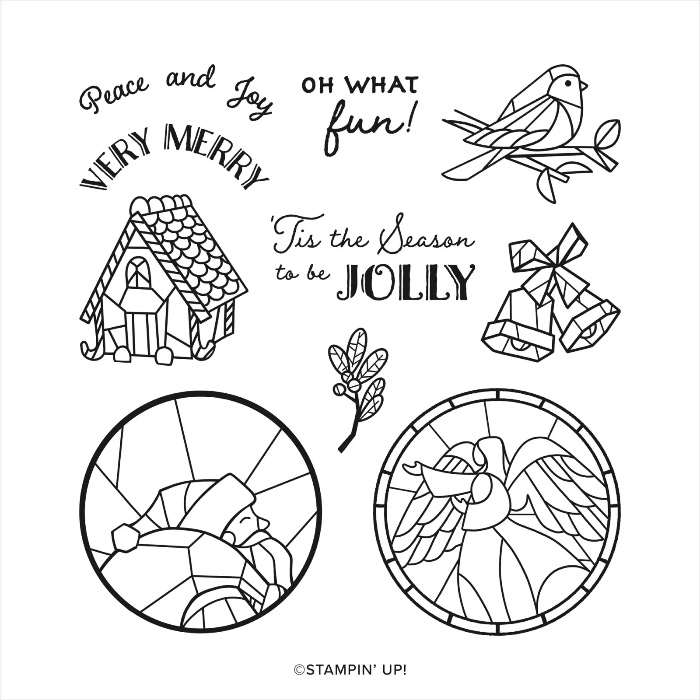
If you are wondering why you don’t see the So Very Merry Stamp set in a Catalogue, it is because it is part of Stampin’ Up’s Online Exclusive products. These products are only shown online and are only available while supplies last. You can see more of the Online Exclusives HERE.
How to Do the Stained Glass Technique
- Use the Embossing Buddy (see supplies below) and rub over some Vellum Cardstock.
- Stamp the image with Versamark ink.
- Sprinkle Gold Embossing Powder over the image, tap off and capture the excess in the tray from the Embossing Additions Tool Kit.
- Use the Heat Tool to heat the embossing powder until golden and shiny. Don’t overheat, as it can burn off the powder.
- Flip the image over and colour the backside of the vellum with Stampin’ Blends markers (see more about Blends markers here). I used the Azure Afternoon Blends for the Angel’s dress and alternating the Light and Dark markers. I did the same thing with the light rays and the Daffodil Delight Blends markers. I used the light Smoky Slate Blends marker to add just a highlight on the wings. I used the Medium Light Blends to colour the Angel’s face and hands. Finally, I alternated the Dark and Light Blueberry Bushel Blends markers around the circle’s perimeter.
- I punched out the circle with the 2- 3/8″ Circle Punch. And then I also punched out another Very Vanilla cardstock circle.
- I attached the Vellum circle to the Very Vanilla circle with some Mini Glue Dots. I placed just a few glue dots behind the darker-coloured parts of the image.

To finish the card, I heat embossed the top of the Azure Afternoon cardstock (I love this pretty blue colour) with a greeting from the stamp set. The curved greeting perfectly fits around the circle.
For the bottom two-thirds of the card, I used the Stampin’ Cut & Emboss machine to emboss the Azure Afternoon cardstock with the Merry Melody Embossing folder, which looks like a music score.

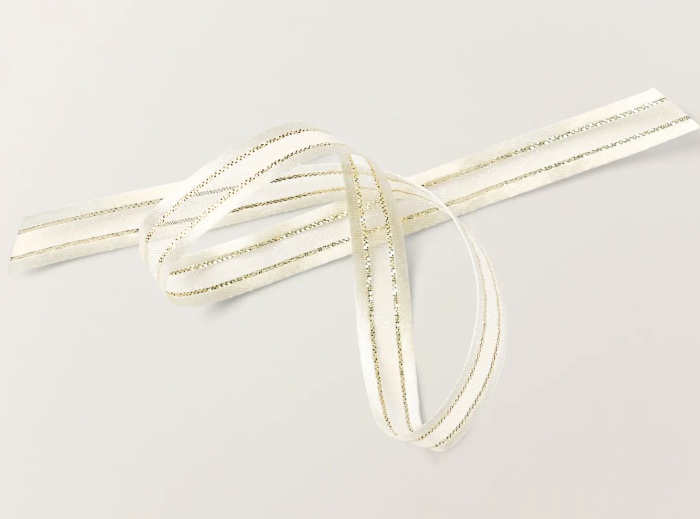
I also added some gorgeous Vanilla & Gold ribbon from Stampin’ Up! I have been waiting to use this ribbon for a special project. The Very Vanilla cardstock is a lovely soft alternative to Basic White and suits this card’s “angelic” nature.
I also added some more gold touches with the three Neutrals Adhesive Backed Sequins on the background panel of the card.
These three colours are really nice for a Christmas Colour Combination.
 If you love Christmas Cards, sign up to get my newsletter here so you don’t miss out on my 12 Weeks of Christmas emails starting soon.
See all the supplies for the Stained Glass Card below.
Stained Glass Card Product List
")


 Circle Punch")
")


 Satin Edged Ribbon")


