
How to Stamp the Art Gallery Stamp Set

The Art Gallery Bundle was one the first stamp sets I wanted from the new Stampin’ Up! January to June Mini Catalogue. This is a two-step stamping set and these can seem a bit strange until you know how to stamp them.
 The idea with a 2-step stamping set is to overlay a darker, smaller image over top of a lighter, more filled in image. With this stamp set you can easily see the that the top two images are meant to go together. But then I think you have artistic license with the rest of the images.
Here’s how I made my image:
- Die cut out a piece of Basic White cardstock with the Stitched Circle Dies.
- On the stitched white circle, stamp the top of the flower image with Blushing Bride ink.
- Stamp the smaller flower image, over top of the first one, with Rococo Rose ink.
- Stamp the flower stem with Old Olive ink.
 You could use the two pieces that I used as accents to the other parts in the set as well. I love that they all work together so that you can mix and match the images to get the artistic effect that you want.
See the complete supply list for my Art Gallery Card below.
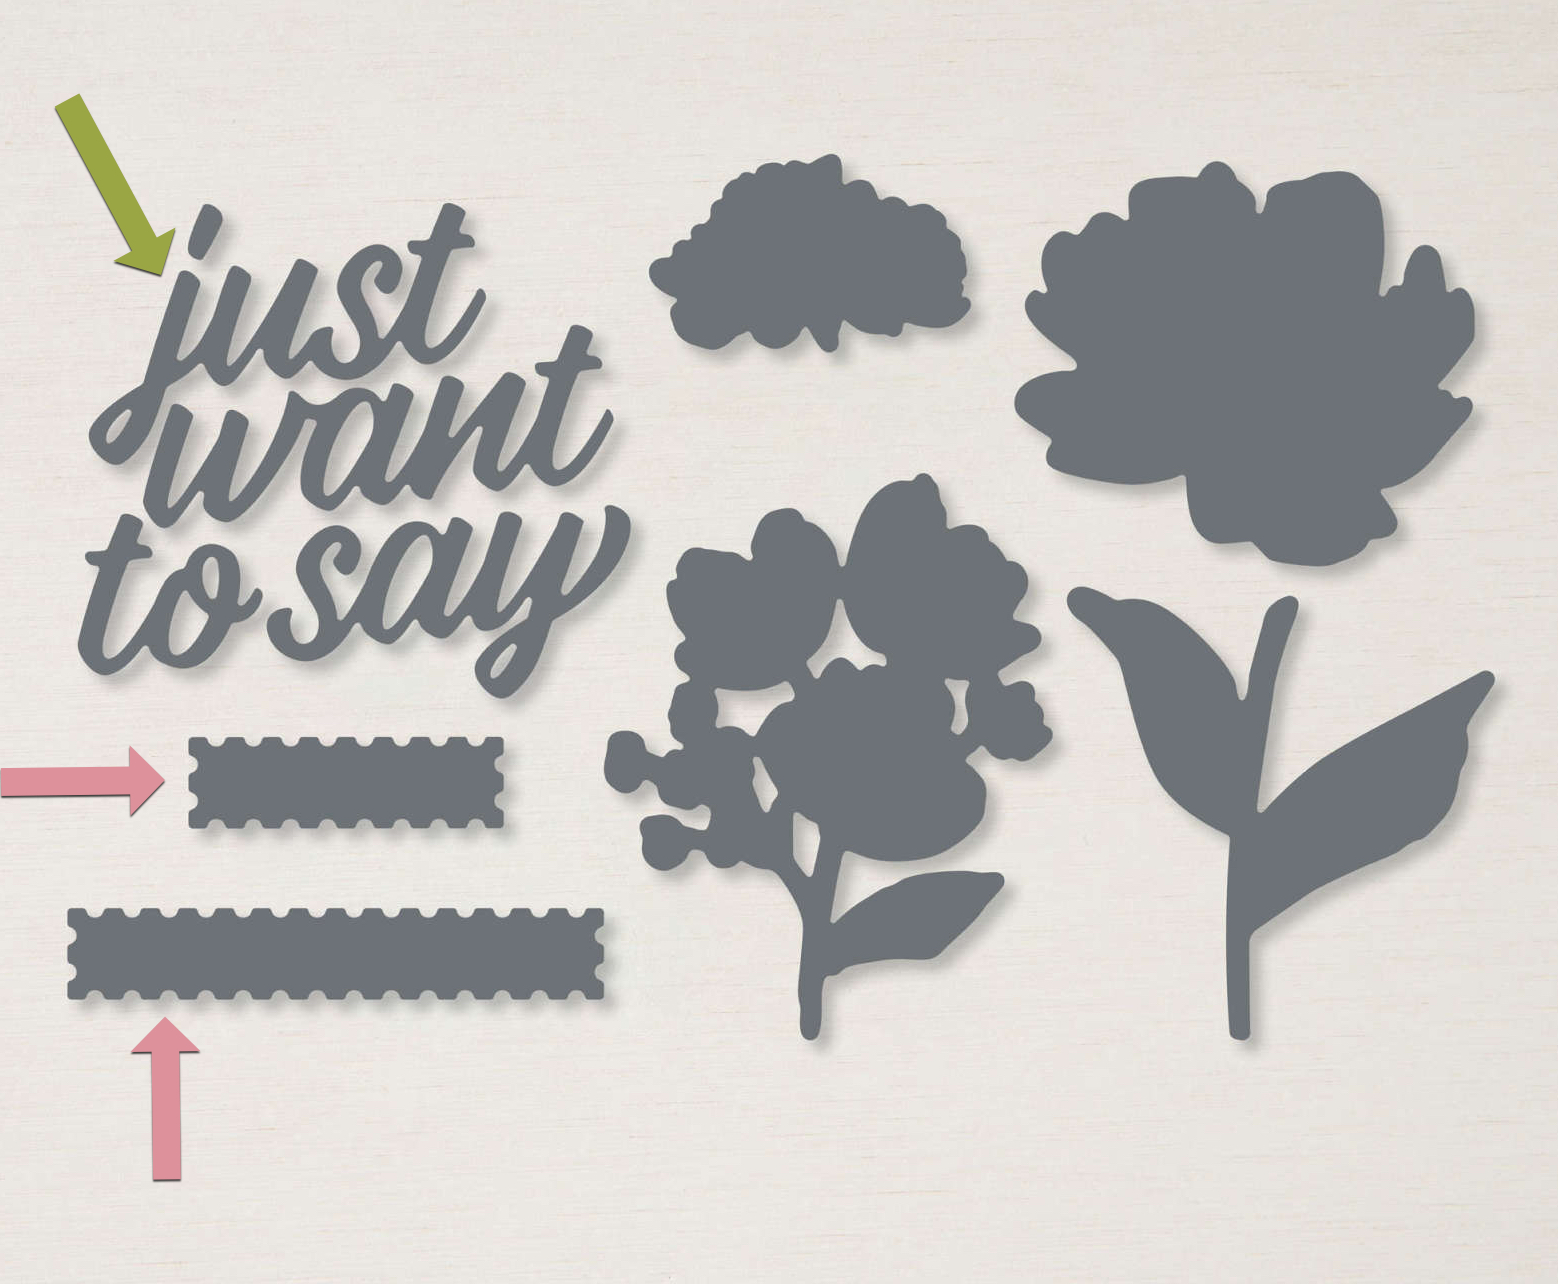
Not only did I fall in love with the look of this stamp set, but I also love a stamp set that has lots of sentiment options. There are nine different greeting sentiments in this stamps set. Wowza! And the die set, includes some little dies that you can use to perfectly stamp the greetings on. See the pink arrows in the diagram below. And if you pair it with the large greeting die (see the green arrow below), you can make lots of different phrases.
I choose to put my greeting on the inside of this card and let the floral image and the amazing Designer Series Paper be the focus on the front of the card. This type of card could be a wedding card, birthday card, anniversary card, and even a sympathy card.
Can you see the shine on this Designer Series Paper? It is the Love You Always Speciality Designer Series Paper. It has a paper with lovely floral accents and comes in a mixed package of Blushing Bride, Rococo Rose, Sahara Sand. I used the Rococo Rose version of the Speciality Designer Series Paper to tie in with my card base and so that my Blushing Bride twine showed nicely on top. Please see the list of all the supplies used below.

I used a new embossing folder on this card (more on that in my next post) and some of the lovely new gems called, Opal Rounds. They are almost clear gems, but a pearl finish, and they have a little bit of shimmer to them. They are the perfect delicate accent for a pretty card.
Be sure to check back to www.StampwithJenn.com for more projects showing off how to use the Art Gallery stamp set and bundle.
Product List


