
Welcome to my home! (a tutorial)
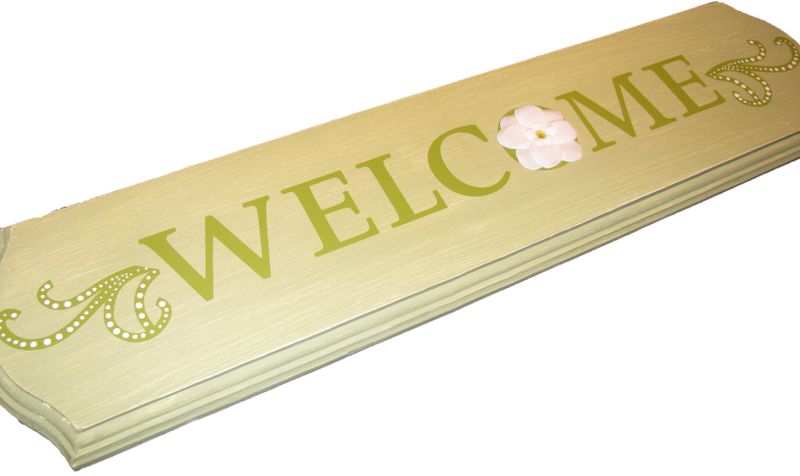
Here's a project I finished recently using the "welcome" and the "dotted flourish" decor elements. I used the medium "welcome" in Old Olive which was $5.95 and the small olive "flourish" which was $4.95. Of course, I had to use green tones….my husband accuses me of being green crazy…almost every wall in our house is some sort of green.
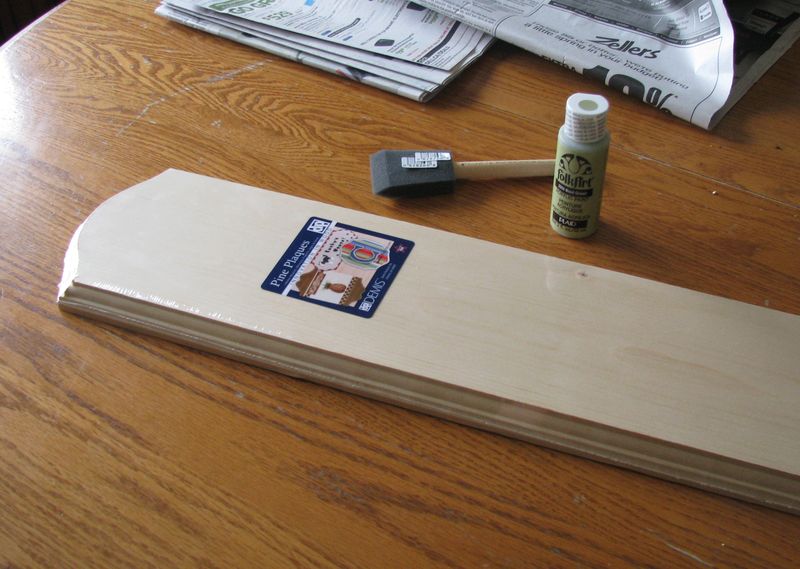
I also used a wood plaque from a local craft store, some primer, a small paint bottle, Stampin' Up's pretties kit (for the flowers) and a white gel pen.
Step 1: Sand and Prime the Wood Plaque.

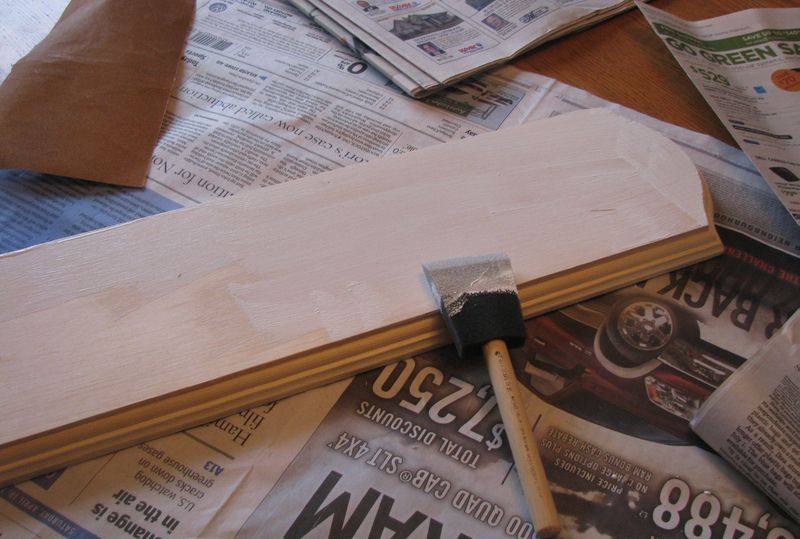
Step 2: Paint the Board with my light green paint. I just did one coat and purposely left brush strokes visible. I also sanded after the paint dried to make the surface very smooth.

Step 3: Measure to find the middle of the board and the middle of the word "welcome".


Step 4: Rub decor elements (on the back) to move the vinyl to the sticky transfer sheet.

Step 5: Peel back the decor grid sheet and leave behind the decor elements on the sticky sheet. If you miss any piece, lay it back down and rub it some more.

Step. 6: Using the centre mark lines, lay the decor element over the wood plaque and rub lightly with your hands to seal in place.


Step 7: Use the Decor Elements Applicator to rub the decor Elements firmly in place and then peel off the backing sheet.


Step 8: I repeated the same process with the Flourish (which I cut in 2 for either end of the sign). I also found it easier to see what I was doing when I trimmed around the paper.


Step 9: Remove Dots from Flourish. This flourish is cool because you use it 3 ways: as one solid piece, the dots only, or remove the dots, as I'm doing here. It took one second to remove the dots using a needle…they just popped out.


Step 10: I thought I needed a
little more white colour showing through, so I took my gel pen and coloured in the dots.
Step 11: I added the pretties flowers. The colour in the centre is from dabbing some kiwi Kiss ink in the centre of the flower with a sponge dauber. I used a hot glue gun to stick my flowers on.
Step 12: I stuck velcro dots from the dollar store on my door and then stuck the sign on those. The sign has not fallen off yet. (The hairy hand in the picture is not mine!)

The finished product on my door! …voila…isn't it gorgeous?? You can click on the image to see it larger. I bet they would charge you big bucks for this in a decorating store. And my total cost was under $20!

Why not give the decor elements a try. It is a quick and inexpensive way to decorate.
Ask me to mail you a brochure or check it out line by clicking HERE.
Very nice! Wow those velcro dots are strong. LoL @ the hairy hands are not yours.