
Flowering Foils for Quick and Easy Cards
I just can’t get enough of the brand new Sale-a-bration Flowering Foils Designer Series Paper from Stampin’ Up!. This package of paper you can get for free with any $60 order by March 31st. Learn more about the free items from Sale-a-bration HERE.
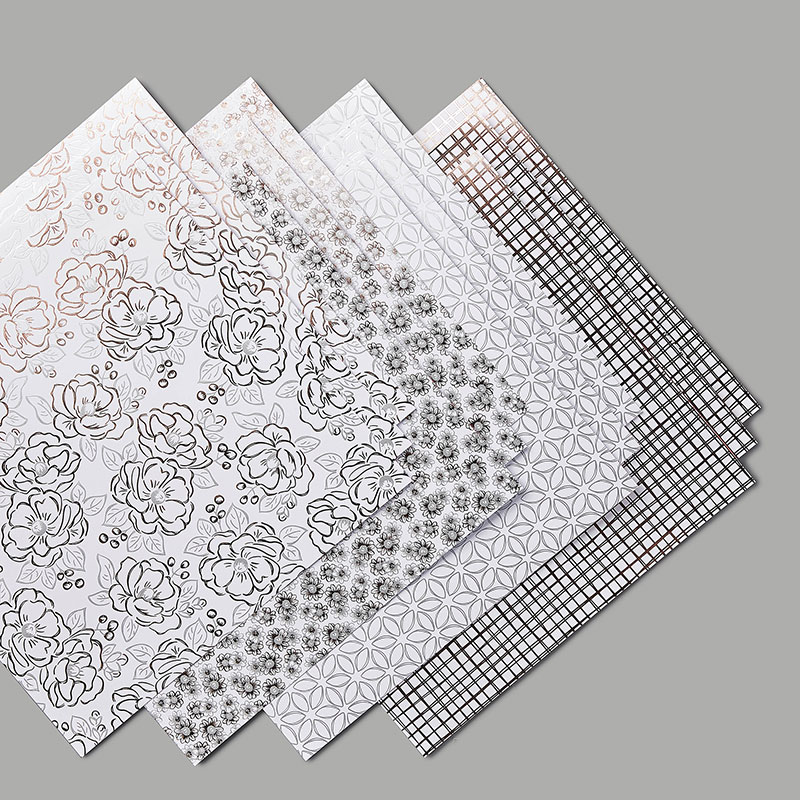
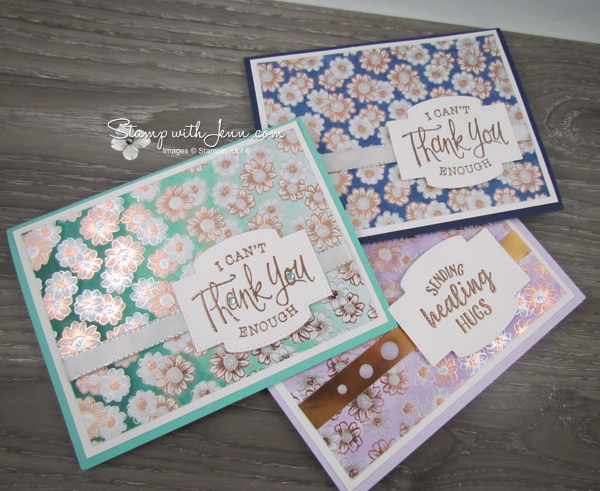
These papers have Rose Gold (it almost looks copper) and Silver Foil accented designs on them and although they are gorgeous with just the white background they come in, they are even more stunning when they are coloured in! See my various versions below. The papers are 12 x 12″ size and you get 3 of each of the 4 designs in the package. For today’s post, I’m focusing on just the pattern with the small little flowers. I’ll post again this week, with what I did with some of the other patterns.
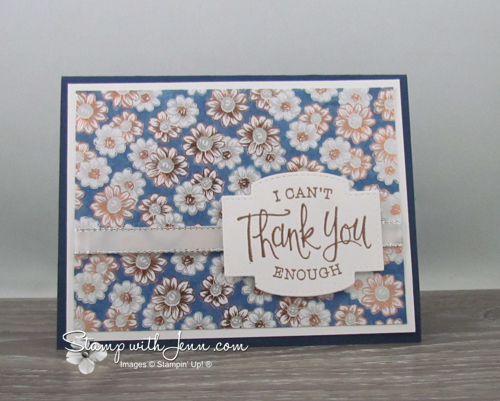
The first card I made, I knew I wanted Night of Navy as my colour as I think Navy and Gold or Silver look stunning together. I coloured in around the flowers using my Light Night of Navy Blends marker to get this effect. Yes, it took some time, but I LOVE to colour and I love the finished look!
I wanted to bring through both the Gold and the Silver colours through on my card so I added two items. I embossed the saying with Copper embossing powder which is a pretty close match to the Rose Gold Metallic. And then I matched the Silver accents by bringing in the Silver Metallic-Edge White ribbon.
I kept the card pretty simple by just adding in the saying on the fun die-cut shape from the Stitched So Sweetly Dies (see all the supplies below for this card). I let the coloured image be the star of this card. And it really does pop with the dark background and the sparkly foil! I just added a white cardstock layer and then the Night of Navy card base. On a side note, I like to add a piece of white cardstock to the inside the card when I use a dark card base.
After my first colour selection with this foil paper, I couldn’t stop and wanted to try out all sorts of colours! Because this paper is 12×12″ size, you can get 6 pieces (plus some scrap) out of the one sheet of Designer Series Paper. That means I can get 18 cards of the exact same design from this one package!
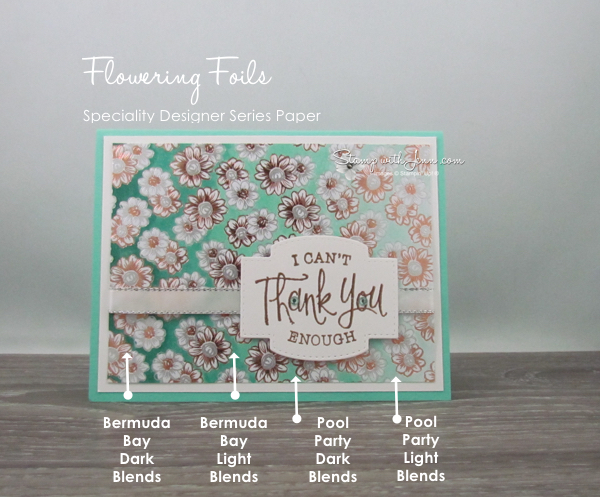
On my second version of this card, I used the same piece of cardstock from the Flowering Foils Designer Series pack, but I decided I wanted an ombre (graduated colour) effect.
Here’s how I made the Ombre Effect on my card:
- I coloured around the flower images with my Blends markers (see more about Blends here). But this time, I used a combination of my Pool Party and Bermuda Bay markers and also the colour lifter. I started by colouring with the Light Pool Party maker and then I just stopped when I had about 1/4″ of the card coloured.
- Then I starting colouring with my Dark Pool Party marker until I reached about the half way point.
- I did the same thing moving along to the Light Bermuda Bay colour and finished with the Dark Bermuda Bay colour.
- I also went back in between the first two colours and went over the transition area with the Lighter colour to help graduate the colour more.
- And at the very end, I went back into the beginning and softened up the lightest colour by adding in some colour lifter to really fade out the colour at that one end.
I finished the card off with the same ribbon and saying as my Night of Navy card. But I did add a couple of blue rhinestones (from the Holiday pack) to the centre of the words.
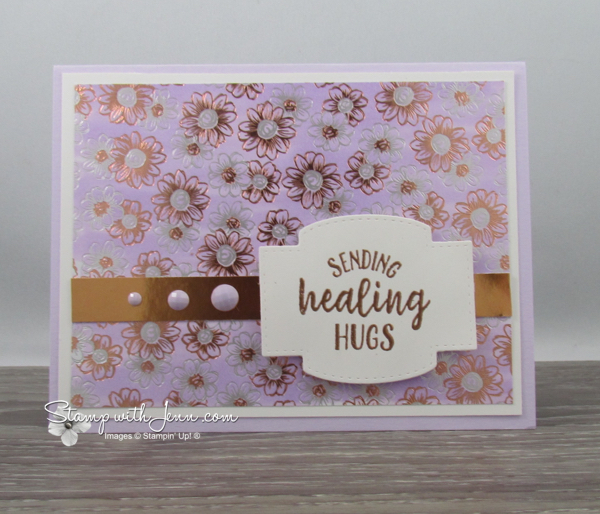 On my third card with the Flowering Foils DSP, I wanted to use purple, as purple is my favourite colour and it is also a colour that looks great with both colours of metals, so I choose Purple Posy. For this version, I didn’t colour around the flowers, but I used my Dark Purple Posy Blends marker and swiped it across the Designer Series Paper. This purple version of the card was much quicker to colour in, but it muted the flowers and made them more part of the background.
For this card, I added a different saying, a strip of Copper Foil paper and some In Color Faceted Dots, in Purple Posy, to match the card base. And I changed the saying to a different one in the So Sentimental stamp set.
You can see the basic supplies I used on the first card below. To shop for any of those items, just click on any image below or go to my Online Store HERE.
I’ll showcase some of the other patterns in the Flowering Foils Speciality Designer Series Paper in my post laster this week on my blog at StampwithJenn.com
Which version of the card do you like the best?
Product List
")
")


